Right here, the interface is made to take care of boundaries for resold accounts, to check studies, as perfectly as to retain track of resource utilization. It also helps to modify packages restrictions of resold accounts.
You will see that the LVE Manager characteristics the adhering to tabs:
- Latest Usage – Makes it possible for for the checking of source utilization from existing resold accounts
- Historic Usage – Permits for the managing of resold accounts’ useful resource use record
- Customers – Permits for the viewing and handling of all resold accounts’ limits
- Data – Lets for the statistical exhibiting of useful resource usage for a certain timeframe or particular resold account
- Choices – Permits for the placing of e mail notifications for LVE Faults
- Deals – Permits for the managing of a package’s limitations
Current Utilization
Historic Use
People
Data
Solutions
Deals
Existing Utilization


The Latest Utilization tab offers information on the adhering to:
- Pace
- Memory (MEM)
- Details Throughput (IO)
- Read/Publish Functions For each Next (IOPS)
- The Quantity of Procedures (PNO)
- Entry Procedures (EP)
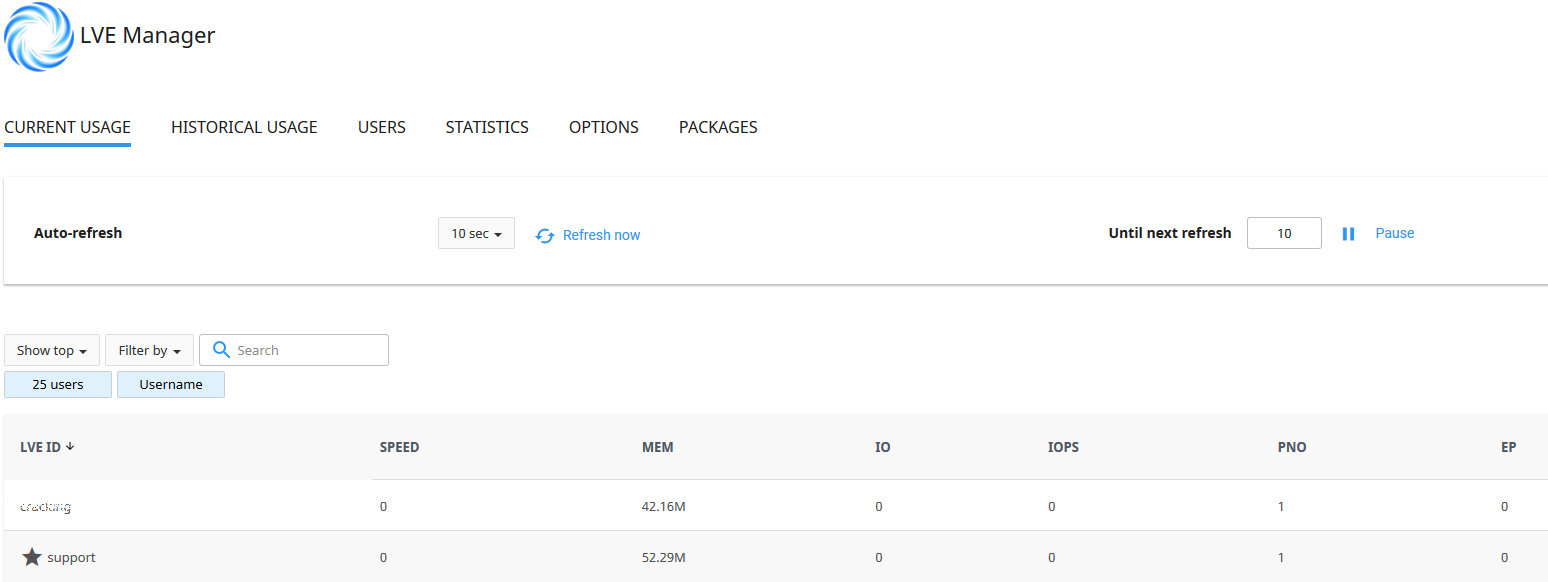
It is also doable to manually refresh the desk by picking out Refresh Now. Or, you can also freeze the values by picking Pause. Keep in intellect that utilization values will not transform until finally the next guide refresh, so Unpause will unfreeze the values and the countdown will go on.
You’ll discover alongside the base of the desk lies the starred line, which displays the full resource usage from equally the resold accounts and that of the reseller’s. For every parameter, the info is revealed as a summary.
Choose the Historical Utilization tab to watch the reseller and resold accounts’ resource use background and faults. To filter the record of users, find Timeframe:
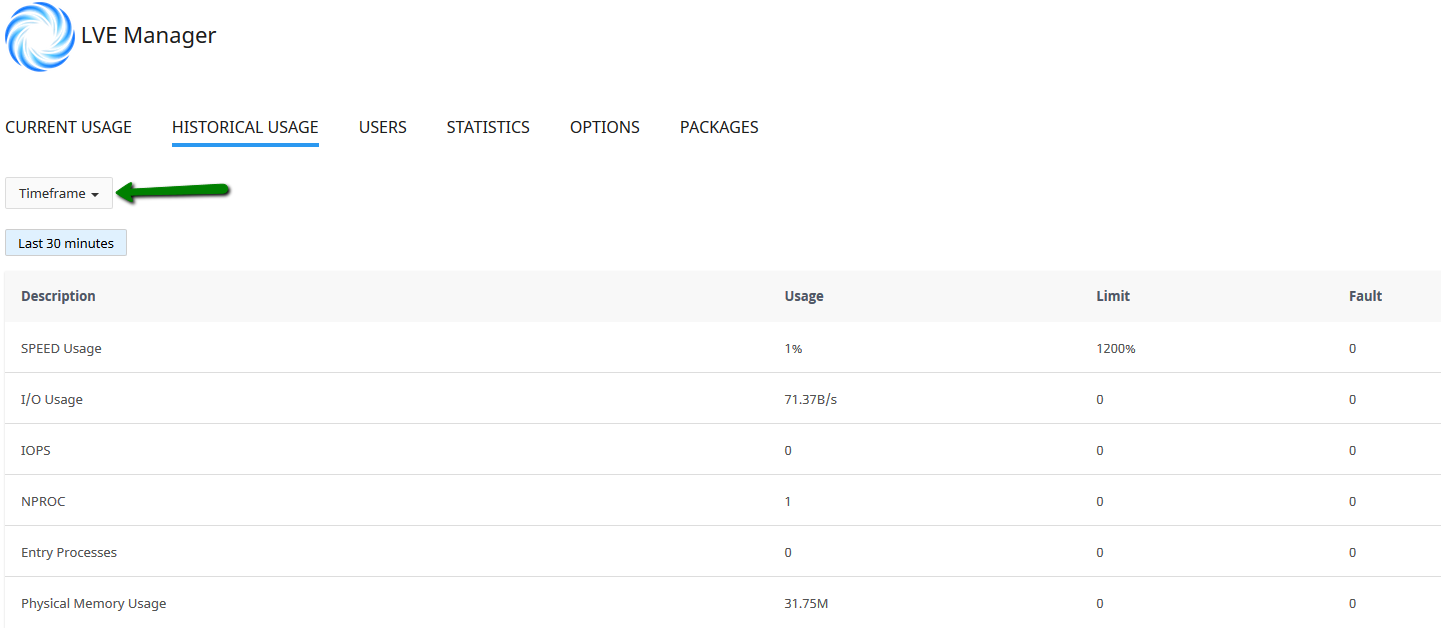
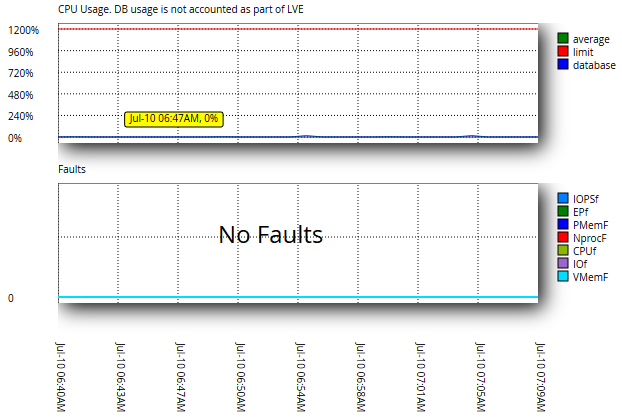
On the Historical Usage site, you will see the checklist of Top 5 Consumers (primarily based on source utilization, for the identical interval as charts/total utilization). To check out useful resource utilization stats for a individual consumer, only find the History icon in the Steps column.

To look at and/or take care of other end users from the Data page, choose the LVE Studies tab at the major of the Best 5 Checklist.
Consumers
To view and deal with the checklist of all resold accounts and their respective useful resource use limits, only decide on the Users tab. The limits are obtainable as follows:

- Selecting Reset to reset restrictions to default values
- Deciding upon Use to not restrict a established endless means to a user
- Placing values for Speed, PMEM, IO, IOPS, EP, and NPROC
Don’t forget to decide on Save to help save your adjustments or Terminate to shut the window.
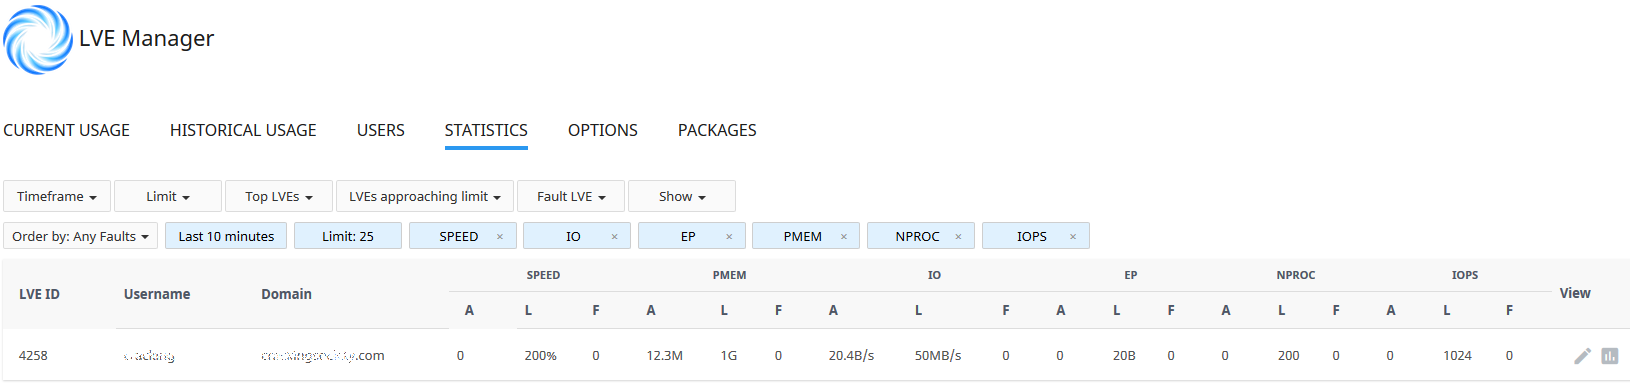
Data
- Timeframe
- Restrict
- Best LVEs
- LVE approaching limit
- Fault LVE
The following parameters are then displayed:
- Velocity per user
- PMEM use for each user
- IO usage for every user
- EP usage per user
- NPROC use per user
- IOPS utilization for each user
Alternatives
Less than the LVE Faults Electronic mail Notifications area, verify the acceptable packing containers to established your sought after variety of notification:
- Notify Me on Users’ Faults – The reseller gets notified when users have exceeded their boundaries
- Notify Customers – Resold accounts get notified when they have exceeded their limitations
- Notify Me When I Strike My Limitations – The reseller will get notified when his/her over-all source use restrictions are reached

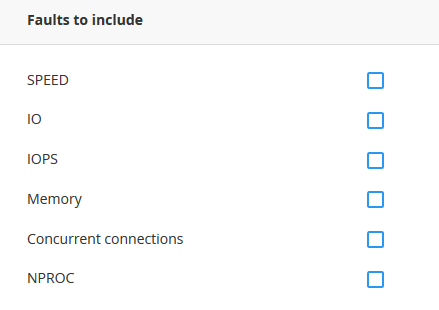
In the Faults to Involve portion, simply verify the ideal packing containers to consist of particular restrictions to sure email notifications:
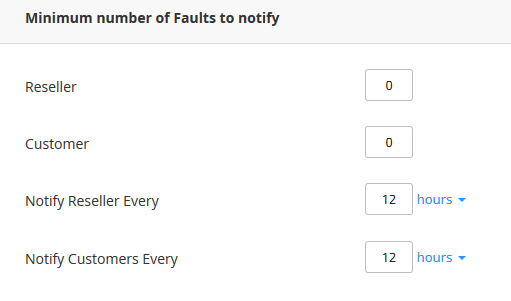
In the Minimum amount Selection of Faults to Notify part, simply just enter the variety of faults expected for a notification to be despatched for the reseller and to the client. You can also set this frequency notification from the reseller.
To implement the transform(s) you selected, click Conserve Alterations.
Deals
To view and modify boundaries for packages, find the Deals tab:
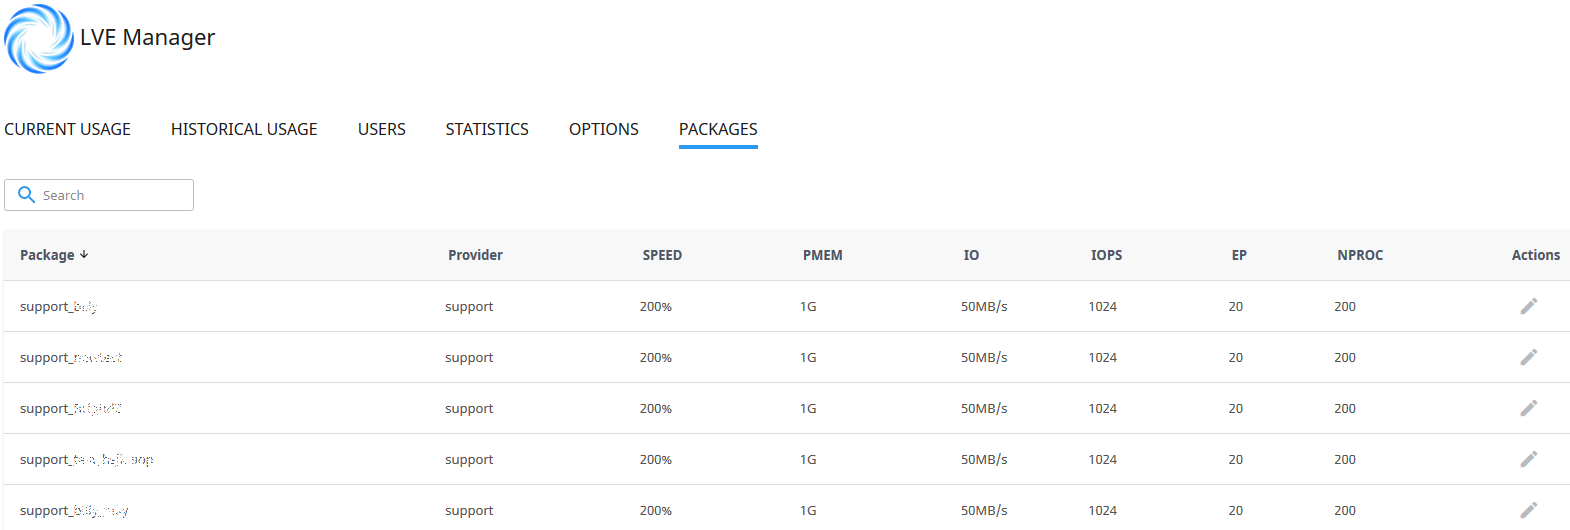
- Speed restrict
- Physical memory (PMEM) – select to set to unlimited
- I/O limitations
- IOPS limits
- Concurrent connections (EP) limitations
When all preferred limits are picked, remember to Save so your adjustments are applied.
Now, you are formally completely ready to go!


Recent Comments